 English
 Afrikaans
 العربية
 বাংলা
বাংলা bosanski jezik
 Български
 Català
 粤语
粤语 中文(简体)
 中文(漢字)
 Hrvatski
 Čeština
 Nederlands
 Eesti keel
 Suomi
Suomi Français
 Deutsch
 Ελληνικά
 हिन्दी; हिंदी
 Magyar
 Bahasa Indonesia
 Italiano
 日本語
日本語 한국어
한국어 Latviešu valoda
 Lietuvių kalba
 македонски јазик
 Bahasa Melayu
 Norsk
Norsk پارسی
پارسی Polski
 Português
 Română
 Русский
 Cрпски језик
 Slovenčina
 Slovenščina
 Español
 Svenska
 ภาษาไทย
 Türkçe
 Українська
 اردو
اردو Tiếng Việt
We offer a wide range of the best 1-Wire DS18B20 sensor connectors, including Nanoflex, DisplayPort, USB, Solar, SATA, HDMI, ATA IDE, SAS & many more. All cables are manufactured to the highest industry standards. Using Sensor Circuit Assembly for box builds allows you to focus on your design and marketing, reduce costs, and reap the benefits of our assembly lines, QA processes, and manufacturing expertise.
Ο αισθητήρας DS18B20 επικοινωνεί χρησιμοποιώντας το “1-Σύρμα” πρωτόκολλο, που σημαίνει ότι χρησιμοποιεί μια ενιαία γραμμή δεδομένων για όλη την επικοινωνία με έναν μικροελεγκτή, επιτρέποντας πολλαπλούς αισθητήρες να συνδέονται στην ίδια γραμμή και να αναγνωρίζονται από τον μοναδικό σειριακό τους κωδικό 64 bit; αυτή η μεμονωμένη γραμμή δεδομένων τραβιέται ψηλά με μια αντίσταση και ο αισθητήρας μεταδίδει δεδομένα τραβώντας τη γραμμή χαμηλά κατά τη διάρκεια συγκεκριμένων χρονοθυρίδων για την αποστολή bits πληροφοριών.
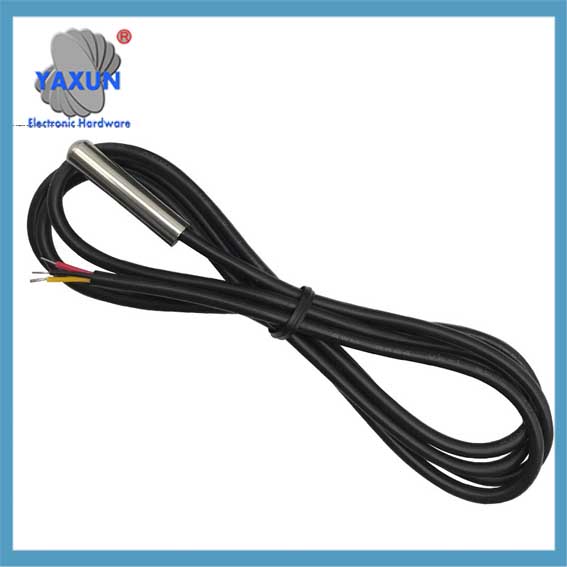
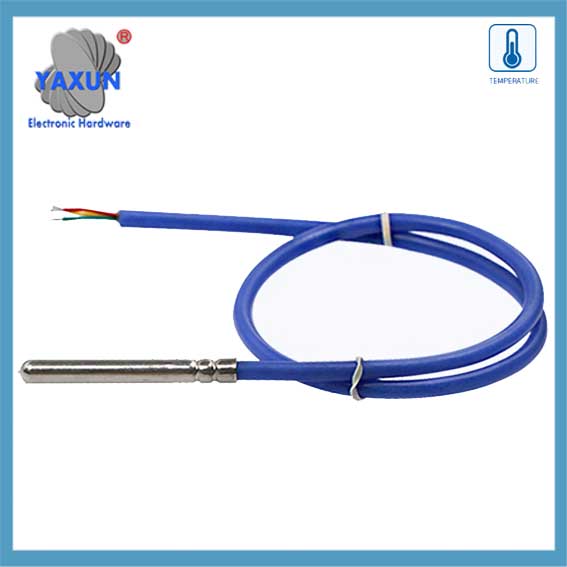
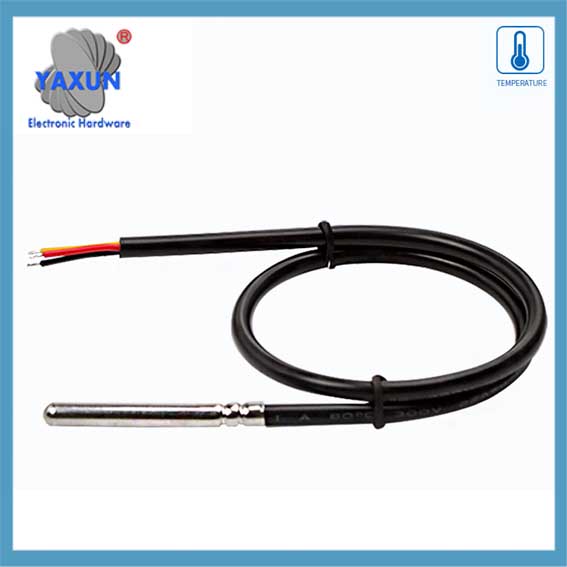
DS18B20 Αισθητήρας θερμοκρασίας: The DS18B20 waterproof probe is designed for underwater use, capable of operating in wet or moist environments without being damaged by water or moisture.
Temperature sensor supply voltage: 3.0V ~ 5.25V;
Εύρος θερμοκρασίας λειτουργίας:-55 ℃ έως +125 ℃ (-67 ℉ to +257 ℉);
Provides from 9-bit to 12-bit Celsius temperature measurements;
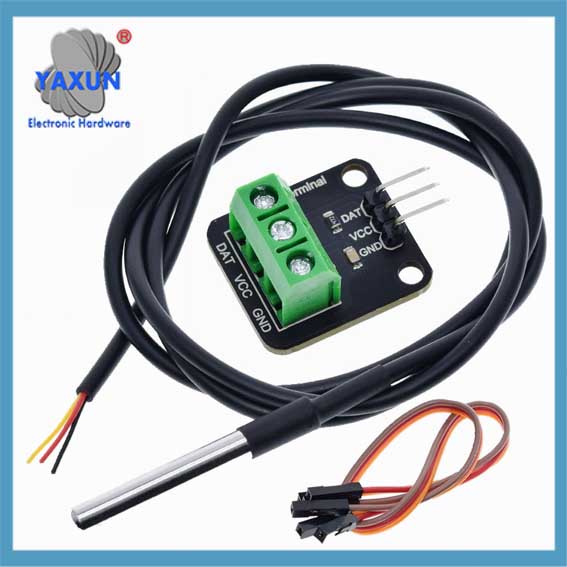
Adapter module is equipped with a pull-up resistor, and directly connects to the GPIO of the Raspberry Pi without an external resistor;
Use this adapter module kit to simplify connecting the waterproof temperature sensor to your project.
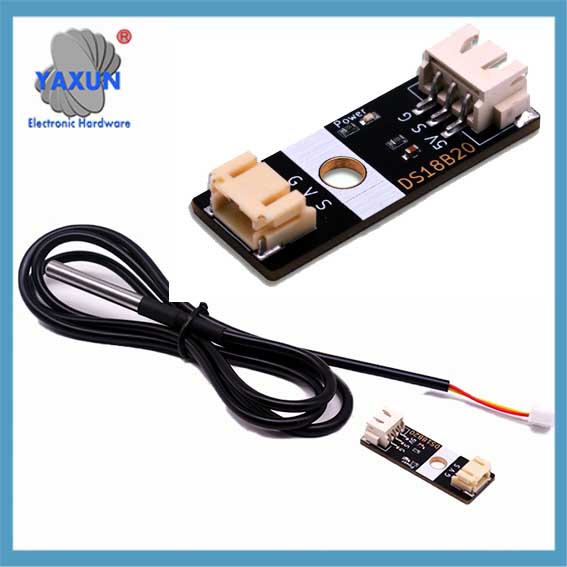 DS18B20 Ψηφιακός αισθητήρας θερμοκρασίας & XH2.54 to PH2.0 module |
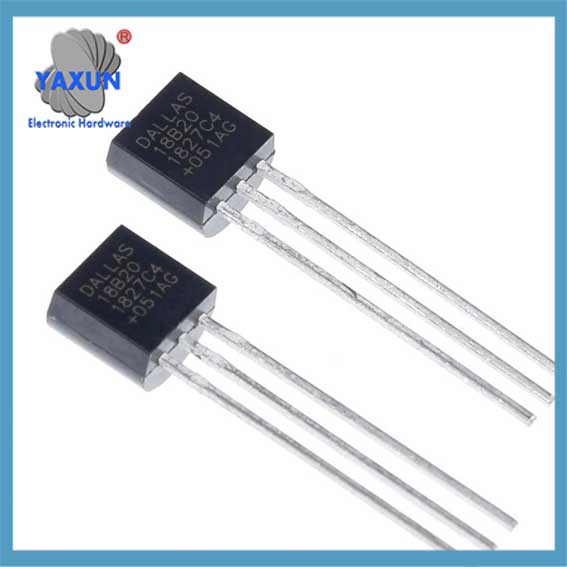 China-made DS18B20 chip temperature acquisition TO-92 temperature sensor |
 Αδιάβροχο καλώδιο 1-σύρματος αισθητήρα θερμοκρασίας DS18B20 + σετ πλακέτας προσαρμογέα |
1. Key points about the 1-Wire protocol:
Single data line:
Only one wire is needed for communication between the sensor and the microcontroller.
Half-duplex communication:
Data can be sent in both directions, but only one direction at a time.
Parasite power:
The DS18B20 can be powered directly from the data line during communication, eliminating the need for a separate power supply in some cases.
Unique device addresses:
Each DS18B20 sensor has a unique 64-bit serial code that allows the microcontroller to identify and address individual sensors on the bus.
Communication steps with a DS18B20:
1.1 Reset pulse:
The microcontroller initiates communication by pulling the data line low for a specific duration (επαναφορά παλμού).
1.2 Presence pulse:
If a DS18B20 is present on the bus, it will respond with a short pulse, indicating its presence.
1.3 Εντολή ROM:
The microcontroller sends a ROM command to either read the unique 64-bit code of a specific sensor (“Ταίριασμα ROM”) or to address all sensors on the bus (“Παράλειψη ROM”).
1.4 Function command:
Depending on the desired operation (like reading temperature), the microcontroller sends a specific function command to the sensor.
1.5 Data transfer:
Data is transmitted bit-by-bit, with the sensor pulling the data line low to send a ‘0’ and letting the line go high to send a ‘1’.
2. Λεπτομερής επεξήγηση του πρωτοκόλλου επικοινωνίας 1-Wire του DS18B20
Ο λόγος για τον οποίο οι αισθητήρες DS18B20 χρησιμοποιούνται ευρέως οφείλεται σε μεγάλο βαθμό στο μοναδικό πρωτόκολλο επικοινωνίας του – 1-Πρωτόκολλο ενσύρματης επικοινωνίας. Αυτό το πρωτόκολλο απλοποιεί τις απαιτήσεις για συνδέσεις υλικού και παρέχει έναν αποτελεσματικό τρόπο μετάδοσης δεδομένων. Αυτό το κεφάλαιο θα αναλύσει σε βάθος τον μηχανισμό λειτουργίας και τη διαδικασία ανταλλαγής δεδομένων του πρωτοκόλλου επικοινωνίας 1 γραμμής για να θέσει μια σταθερή βάση για την επακόλουθη πρακτική προγραμματισμού.
2.1 Βασικά Πρωτόκολλο Επικοινωνίας 1 Wire
2.1.1 Χαρακτηριστικά του πρωτοκόλλου επικοινωνίας 1-Wire:
Ονομάζεται επίσης πρωτόκολλο επικοινωνίας 1-Wire DS18B20 “ενιαίο λεωφορείο” τεχνολογία. Διαθέτει τα ακόλουθα χαρακτηριστικά: – Ενιαίο λεωφορείο επικοινωνίας: Μόνο μία γραμμή δεδομένων χρησιμοποιείται για αμφίδρομη μετάδοση δεδομένων, γεγονός που μειώνει σημαντικά την πολυπλοκότητα της καλωδίωσης σε σύγκριση με την παραδοσιακή μέθοδο επικοινωνίας με αισθητήρα πολλαπλών καλωδίων. – Σύνδεση πολλαπλών συσκευών: Υποστηρίζει τη σύνδεση πολλαπλών συσκευών σε έναν δίαυλο δεδομένων, και αναγνωρίζει και επικοινωνεί μέσω κωδικών αναγνώρισης συσκευών. – Χαμηλή κατανάλωση ρεύματος: Κατά την επικοινωνία, η συσκευή μπορεί να βρίσκεται σε κατάσταση αναμονής χαμηλής κατανάλωσης όταν δεν συμμετέχει στην επικοινωνία. – Υψηλή ακρίβεια: Με μικρότερο χρόνο μετάδοσης δεδομένων, Μπορεί να μειώσει τις εξωτερικές παρεμβολές και να βελτιώσει την ακρίβεια των δεδομένων.
2.1.2 Μορφή δεδομένων και ανάλυση χρονισμού της 1-wire επικοινωνίας
Η μορφή δεδομένων του πρωτοκόλλου επικοινωνίας 1 καλωδίου ακολουθεί έναν συγκεκριμένο κανόνα χρονισμού. Περιλαμβάνει χρονισμό αρχικοποίησης, συγγραφή χρόνου και ανάγνωση χρόνου:
Χρόνος εκκίνησης: Ο κεντρικός υπολογιστής ξεκινά πρώτα τον χρονισμό ανίχνευσης παρουσίας (Παλμός Παρουσίας) κατεβάζοντας το λεωφορείο για ορισμένο χρονικό διάστημα, και ο αισθητήρας στέλνει στη συνέχεια έναν παλμό παρουσίας ως απόκριση.
Γράψτε το χρονοδιάγραμμα: Όταν ο κεντρικός υπολογιστής στέλνει ένα χρονισμό εγγραφής, κατεβαίνει πρώτα το λεωφορείο για περίπου 1-15 μικροδευτερόλεπτα, στη συνέχεια απελευθερώνει το λεωφορείο, και ο αισθητήρας κατεβάζει το λεωφορείο μέσα 60-120 μικροδευτερόλεπτα για να ανταποκριθεί.
Διαβάστε το χρονοδιάγραμμα: Ο κεντρικός υπολογιστής ειδοποιεί τον αισθητήρα να στείλει δεδομένα τραβώντας προς τα κάτω το δίαυλο και απελευθερώνοντάς τον, και ο αισθητήρας θα εξάγει το bit δεδομένων στο δίαυλο μετά από μια ορισμένη καθυστέρηση.
 Analog Devices DS18B20+, MAXIM Programmable Resolution 1-Wire Digital Thermometer |
 DS18B20 12-bit 1-Wire Digital Temperature Sensor w/ 1 Meter Cable |
 DS18B20 sensor probe dedicated to temperature and humidity collection in cold chain cold storage |
2.2 Software implementation of data communication
2.2.1 Initialization and reset of 1-line communication
At the software level, initialization and reset of 1-Wire communication is the first step of communication. The following is the pseudo code to implement this process:
// OneWire communication initialization function
void OneWire_Init() {
// Set the bus to input mode and enable the pull-up resistor
SetPinMode(DS18B20_PIN, INPUT_PULLUP);
// Wait for the bus to be idle
DelayMicroseconds(1);
// Send a reset pulse
OneWire_Reset();
}
// OneWire communication reset function
void OneWire_Reset() {
// Pull down the bus
SetPinMode(DS18B20_PIN, OUTPUT_LOW);
DelayMicroseconds(480);
// Release the bus
SetPinMode(DS18B20_PIN, INPUT_PULLUP);
DelayMicroseconds(70);
// Wait for the presence of a pulse
αν (!WaitForOneWirePresence())
// No pulse was detected, maybe the sensor is not connected or the initialization failed
HandleError();
DelayMicroseconds(410);
}
// Waiting for the presence of a pulse
bool WaitForOneWirePresence() {
return ReadPin(DS18B20_PIN) == 0; // Assume low level is a signal presence
}
2.2.2 Data reading and writing operations
Data reading and writing operations are the core part of sensor communication. The following code shows how to write a byte to a one-wire bus:
// Write a byte to a one-wire bus
void OneWire_WriteByte(byte data) {
για (int i = 0; εγώ < 8; i++) {
OneWire_WriteBit(data & 0x01);
data >>= 1;
}
}
// Write a bit to a one-wire bus
void OneWire_WriteBit(bit data) {
SetPinMode(DS18B20_PIN, OUTPUT_LOW);
αν (data) {
// Release the bus when writing 1
SetPinMode(DS18B20_PIN, INPUT_PULLUP);
DelayMicroseconds(1);
} αλλού {
// Continue to pull the bus low when writing 0
DelayMicroseconds(60);
}
SetPinMode(DS18B20_PIN, INPUT_PULLUP);
DelayMicroseconds(1);
}
Next is the function to read a byte:
// Read a byte from the one-wire bus
byte OneWire_ReadByte() {
byte data = 0;
για (int i = 0; εγώ < 8; i++) {
data >>= 1;
αν (OneWire_ReadBit())
data |= 0x80;
}
return data;
}
// Read a bit from the one-wire bus
bit OneWire_ReadBit() {
SetPinMode(DS18B20_PIN, OUTPUT_LOW);
SetPinMode(DS18B20_PIN, INPUT_PULLUP);
DelayMicroseconds(3);
bool result = ReadPin(DS18B20_PIN);
DelayMicroseconds(57);
return result;
}
2.2.3 Verification mechanism of OneWire communication
The OneWire communication protocol uses a simple verification mechanism in the data exchange process, usually by reading back the written data to verify the correctness of the data. The following is a sample code for verifying the written data:
byte data = 0x55; // Assume that the data to be sent
OneWire_WriteByte(data); // Write data to the OneWire bus
byte readData = OneWire_ReadByte(); // Read back data from the OneWire bus
αν (readData != data) {
HandleError(); // If the read-back data does not match the written data, handle the error