 English
 Afrikaans
 العربية
 বাংলা
বাংলা bosanski jezik
 Български
 Català
 粤语
粤语 中文(简体)
 中文(漢字)
 Hrvatski
 Čeština
 Nederlands
 Eesti keel
 Suomi
Suomi Français
 Deutsch
 Ελληνικά
 हिन्दी; हिंदी
 Magyar
 Bahasa Indonesia
 Italiano
 日本語
日本語 한국어
한국어 Latviešu valoda
 Lietuvių kalba
 македонски јазик
 Bahasa Melayu
 Norsk
Norsk پارسی
پارسی Polski
 Português
 Română
 Русский
 Cрпски језик
 Slovenčina
 Slovenščina
 Español
 Svenska
 ภาษาไทย
 Türkçe
 Українська
 اردو
اردو Tiếng Việt
ما طیف گسترده ای از بهترین کانکتورهای سنسور 1-Wire DS18B20 را ارائه می دهیم, از جمله نانوفلکس, DisplayPort, USB, خورشیدی, SATA, HDMI, این ایده است, SAS & بسیاری دیگر. تمامی کابل ها مطابق با بالاترین استانداردهای صنعتی تولید می شوند. استفاده از مجموعه مدار حسگر برای ساخت جعبه به شما امکان می دهد بر روی طراحی و بازاریابی خود تمرکز کنید, کاهش هزینه ها, و از مزایای خطوط مونتاژ ما بهره مند شوید, فرآیندهای QA, و تخصص تولید.
سنسور DS18B20 با استفاده از “1-سیم” پروتکل, به این معنی که از یک خط داده واحد برای تمام ارتباطات با یک میکروکنترلر استفاده می کند, اجازه می دهد چندین سنسور در یک خط به هم متصل شوند و با کد سریال 64 بیتی منحصر به فرد آنها شناسایی شوند; این خط داده واحد با یک مقاومت بالا کشیده می شود و سنسور با پایین کشیدن خط در بازه های زمانی خاص برای ارسال بیت های اطلاعات داده ها را منتقل می کند..
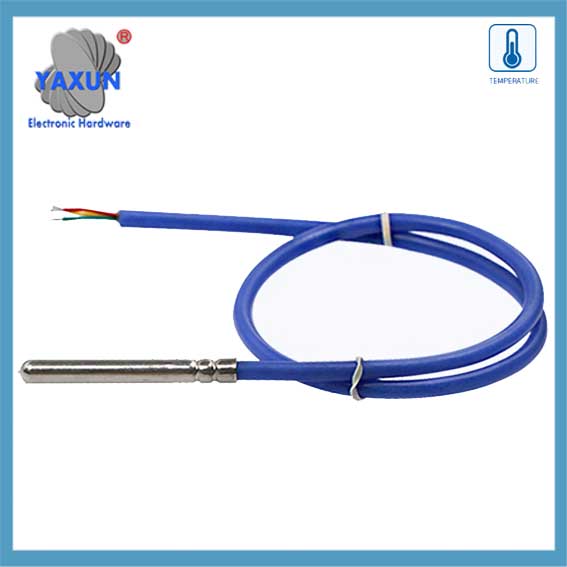
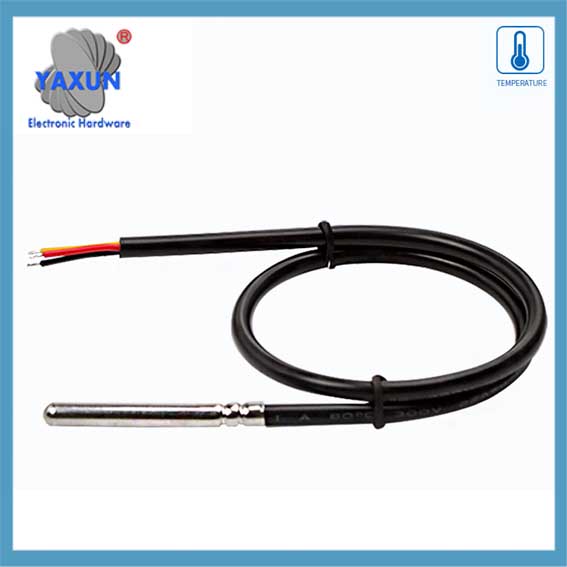
سنسور دما DS18B20: پروب ضد آب DS18B20 برای استفاده در زیر آب طراحی شده است, قادر به کار در محیط های مرطوب یا مرطوب بدون آسیب آب یا رطوبت است.
ولتاژ منبع تغذیه سنسور دما: 3.0V ~ 5.25 ولت;
محدوده دمای عملیاتی:-55 ℃ به +125 ℃ (-67 ℉ به +257 ℉);
اندازه گیری دمای 9 بیتی تا 12 بیتی را ارائه می دهد;
ماژول آداپتور مجهز به یک مقاومت کششی است, و مستقیماً بدون مقاومت خارجی به GPIO Raspberry Pi متصل می شود;
از این کیت ماژول آداپتور برای ساده کردن اتصال سنسور دمای ضد آب به پروژه خود استفاده کنید.
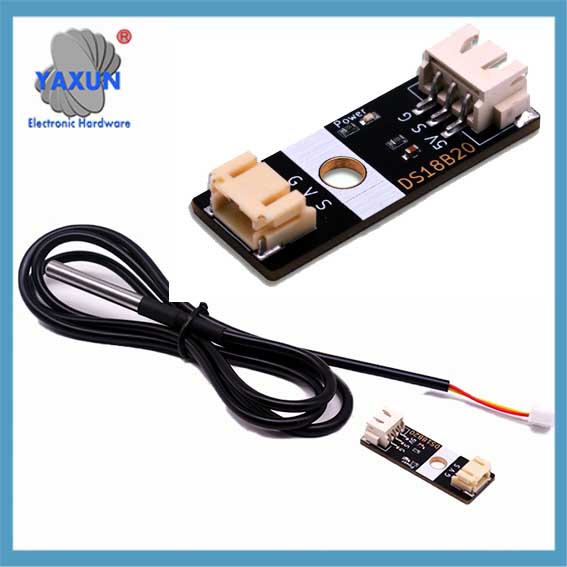 پروب سنسور دما دیجیتال DS18B20 & ماژول XH2.54 تا PH2.0 |
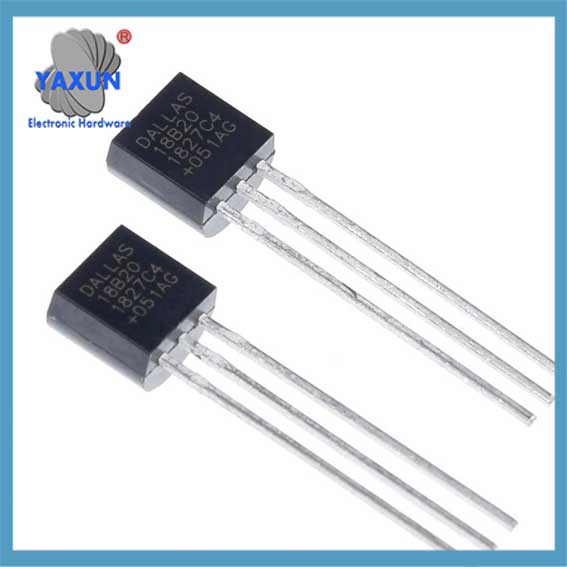 سنسور دمای TO-92 تراشه DS18B20 ساخت چین |
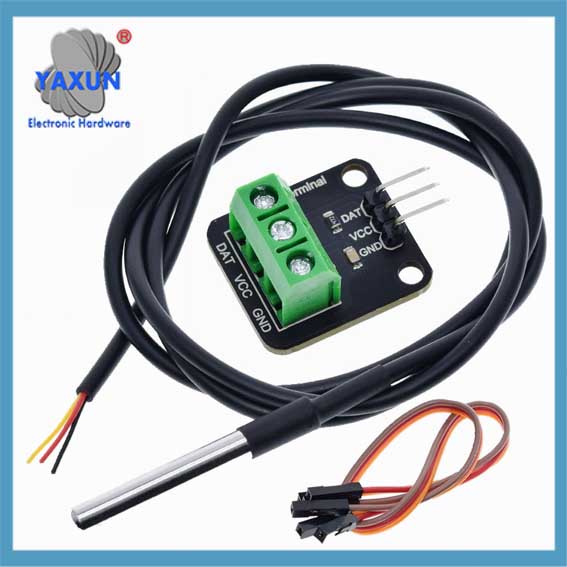 کابل ضد آب 1 سیم سنسور دما DS18B20 + مجموعه برد آداپتور |
1. نکات کلیدی در مورد پروتکل 1-Wire:
تک خط داده:
فقط یک سیم برای ارتباط بین سنسور و میکروکنترلر مورد نیاز است.
ارتباط نیمه دوبلکس:
داده ها را می توان در هر دو جهت ارسال کرد, اما فقط یک جهت در یک زمان.
قدرت انگل:
DS18B20 می تواند به طور مستقیم از خط داده در طول ارتباط تغذیه شود, رفع نیاز به منبع تغذیه جداگانه در برخی موارد.
آدرس های دستگاه منحصر به فرد:
هر سنسور DS18B20 دارای یک کد سریال منحصر به فرد 64 بیتی است که به میکروکنترلر اجازه می دهد تا سنسورهای جداگانه را در گذرگاه شناسایی و آدرس دهی کند..
مراحل ارتباط با DS18B20:
1.1 ریست پالس:
میکروکنترلر ارتباط را با پایین کشیدن خط داده برای مدت زمان مشخصی آغاز می کند (ریست پالس).
1.2 نبض حضور:
اگر یک DS18B20 در اتوبوس وجود دارد, با یک پالس کوتاه پاسخ خواهد داد, حضور آن را نشان می دهد.
1.3 دستور رام:
میکروکنترلر یک فرمان ROM برای خواندن کد 64 بیتی منحصر به فرد یک سنسور خاص ارسال می کند (“رام را مطابقت دهید”) یا برای آدرس دهی به تمام سنسورهای موجود در اتوبوس (“رام را رد کنید”).
1.4 فرمان تابع:
بسته به عملیات مورد نظر (مانند دمای خواندن), میکروکنترلر فرمان عملکرد خاصی را به سنسور ارسال می کند.
1.5 انتقال داده:
داده ها بیت به بیت منتقل می شوند, با کشیدن سنسور خط داده به سمت پایین برای ارسال a ‘0’ و اجازه دادن به خط بالا برای ارسال "1".
2. توضیحات دقیق درباره پروتکل ارتباطی 1 سیم DS18B20
دلیل استفاده گسترده از سنسورهای DS18B20 تا حد زیادی به دلیل پروتکل ارتباطی منحصر به فرد آن است – 1-پروتکل ارتباطی سیم. این پروتکل الزامات مربوط به اتصالات سخت افزاری را ساده می کند و روشی کارآمد برای انتقال داده ها فراهم می کند. در این فصل به طور عمیق مکانیسم کار و فرآیند تبادل داده پروتکل ارتباطی 1 خطی را تجزیه و تحلیل می کند تا پایه و اساس محکمی برای تمرین برنامه نویسی بعدی ایجاد کند.
2.1 مبانی پروتکل ارتباطی 1 سیم
2.1.1 ویژگی های پروتکل ارتباطی 1 سیم:
پروتکل ارتباطی 1 سیم DS18B20 نیز نامیده می شود “تک اتوبوس” فناوری. این ویژگی های زیر را دارد: – ارتباطات تک اتوبوس: فقط یک خط داده برای انتقال داده های دو طرفه استفاده می شود, که پیچیدگی سیم کشی را در مقایسه با روش ارتباط سنتی سنسور چند سیم کاهش می دهد. – اتصال چند دستگاهی: از اتصال چندین دستگاه در یک اتوبوس داده پشتیبانی می کند, و از طریق کدهای شناسایی دستگاه شناسایی و ارتباط برقرار می کند. – مصرف انرژی کم: در حین برقراری, این دستگاه هنگام شرکت در ارتباطات می تواند در حالت آماده به کار کم قدرت قرار داشته باشد. – با دقت بالا: با زمان انتقال داده کوتاه تر, این می تواند تداخل خارجی را کاهش داده و دقت داده ها را بهبود بخشد.
2.1.2 قالب داده ها و تجزیه و تحلیل زمان بندی ارتباط 1 سیم
قالب داده پروتکل ارتباطی 1 سیم از یک قانون زمان بندی خاص پیروی می کند. این شامل زمان بندی اولیه سازی است, زمان بندی را بنویسید و زمان بندی را بخوانید:
زمان بندی اولیه سازی: میزبان ابتدا زمان تشخیص حضور را شروع می کند (نبض حضور) با پایین کشیدن اتوبوس برای مدت معینی, و سنسور سپس یک پالس حضور در پاسخ می فرستد.
زمان نوشتن: وقتی میزبان زمان نوشتن را ارسال می کند, ابتدا اتوبوس را در حدود پایین می کشد 1-15 میکرو ثانیه, سپس اتوبوس را آزاد می کند, و سنسور اتوبوس را پایین می آورد 60-120 میکرو ثانیه ها برای پاسخ دادن.
زمان را بخوانید: میزبان با کشیدن اتوبوس و رها کردن آن ، سنسور را به ارسال داده ها اطلاع می دهد, و سنسور پس از تأخیر خاص ، بیت داده را در اتوبوس خروجی می کند.
 دستگاه های آنالوگ DS18B20+, دماسنج دیجیتال 1 سیمی با وضوح قابل برنامه ریزی MAXIM |
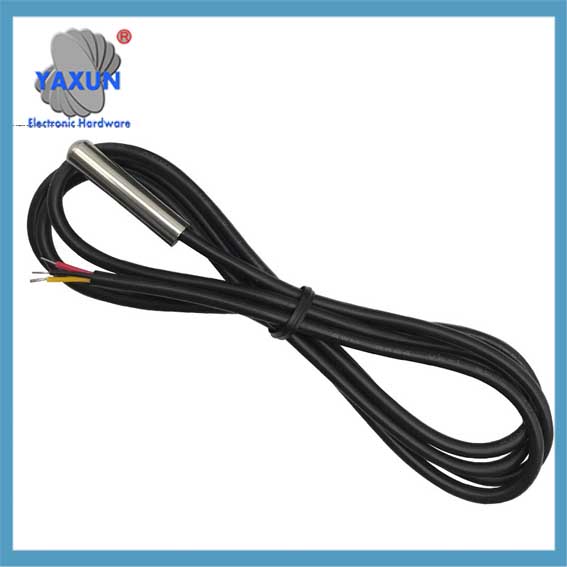
 سنسور دمای دیجیتال 1 سیمی 12 بیتی DS18B20 با 1 کابل متر |
 کاوشگر سنسور DS18B20 مخصوص جمع آوری دما و رطوبت در انبار سرد زنجیره ای سرد |
2.2 پیاده سازی نرم افزار ارتباطات داده
2.2.1 راه اندازی و تنظیم مجدد ارتباطات 1 خطی
در سطح نرم افزار, راه اندازی و تنظیم مجدد ارتباطات 1-Wire اولین مرحله ارتباط است. در زیر کد شبه برای پیاده سازی این فرآیند آمده است:
// تابع تنظیم اولیه ارتباط OneWire
OneWire_Init را باطل کنید() {
// گذرگاه را روی حالت ورودی قرار دهید و مقاومت کششی را فعال کنید
SetPinMode(DS18B20_PIN, INPUT_PULLUP);
// منتظر بمانید تا اتوبوس بیکار شود
DelayMicroseconds(1);
// یک پالس تنظیم مجدد ارسال کنید
OneWire_Reset();
}
// عملکرد بازنشانی ارتباط OneWire
OneWire_Reset را باطل کنید() {
// اتوبوس را پایین بکشید
SetPinMode(DS18B20_PIN, OUTPUT_LOW);
DelayMicroseconds(480);
// اتوبوس را رها کن
SetPinMode(DS18B20_PIN, INPUT_PULLUP);
DelayMicroseconds(70);
// منتظر حضور نبض باشید
اگر (!WaitForOneWirePresence())
// هیچ نبضی تشخیص داده نشد, ممکن است سنسور متصل نباشد یا مقداردهی اولیه ناموفق باشد
HandleError();
DelayMicroseconds(410);
}
// در انتظار حضور نبض
bool WaitForOneWirePresence() {
ReadPin را برگردانید(DS18B20_PIN) == 0; // فرض کنید سطح پایین وجود سیگنال است
}
2.2.2 عملیات خواندن و نوشتن داده ها
عملیات خواندن و نوشتن داده ها بخش اصلی ارتباطات حسگر است. کد زیر نحوه نوشتن یک بایت در یک گذرگاه یک سیم را نشان می دهد:
// یک بایت در یک گذرگاه یک سیم بنویسید
OneWire_WriteByte را باطل کنید(داده های بایت) {
برای (int i = 0; من < 8; i++) {
OneWire_WriteBit(داده ها & 0x01);
داده ها >>= 1;
}
}
// کمی به اتوبوس یک سیم بنویسید
OneWire_WriteBit را باطل کنید(داده های بیتی) {
SetPinMode(DS18B20_PIN, OUTPUT_LOW);
اگر (داده ها) {
// هنگام نوشتن، اتوبوس را رها کنید 1
SetPinMode(DS18B20_PIN, INPUT_PULLUP);
DelayMicroseconds(1);
} دیگر {
// هنگام نوشتن، اتوبوس را به سمت پایین بکشید 0
DelayMicroseconds(60);
}
SetPinMode(DS18B20_PIN, INPUT_PULLUP);
DelayMicroseconds(1);
}
بعد تابع خواندن یک بایت است:
// یک بایت از اتوبوس یک سیم بخوانید
بایت OneWire_ReadByte() {
داده بایت = 0;
برای (int i = 0; من < 8; i++) {
داده ها >>= 1;
اگر (OneWire_ReadBit())
داده ها |= 0x80;
}
داده ها را برگرداند;
}
// کمی از اتوبوس یک سیم بخوانید
بیت OneWire_ReadBit() {
SetPinMode(DS18B20_PIN, OUTPUT_LOW);
SetPinMode(DS18B20_PIN, INPUT_PULLUP);
DelayMicroseconds(3);
نتیجه bool = ReadPin(DS18B20_PIN);
DelayMicroseconds(57);
نتیجه بازگشت;
}
2.2.3 مکانیسم تأیید ارتباط OneWire
پروتکل ارتباطی OneWire از یک مکانیسم تأیید ساده در فرآیند تبادل داده استفاده می کند, معمولاً با خواندن مجدد داده های نوشته شده برای تأیید صحت داده ها. در زیر یک کد نمونه برای تایید داده های نوشته شده است:
داده بایت = 0x55; // فرض کنید داده هایی که قرار است ارسال شوند
OneWire_WriteByte(داده ها); // داده ها را در گذرگاه OneWire بنویسید
بایت readData = OneWire_ReadByte(); // بازخوانی اطلاعات از گذرگاه OneWire
اگر (خواندن داده ها != داده) {
HandleError(); // اگر داده های بازخوانی با داده های نوشته شده مطابقت نداشته باشد, خطا را مدیریت کند